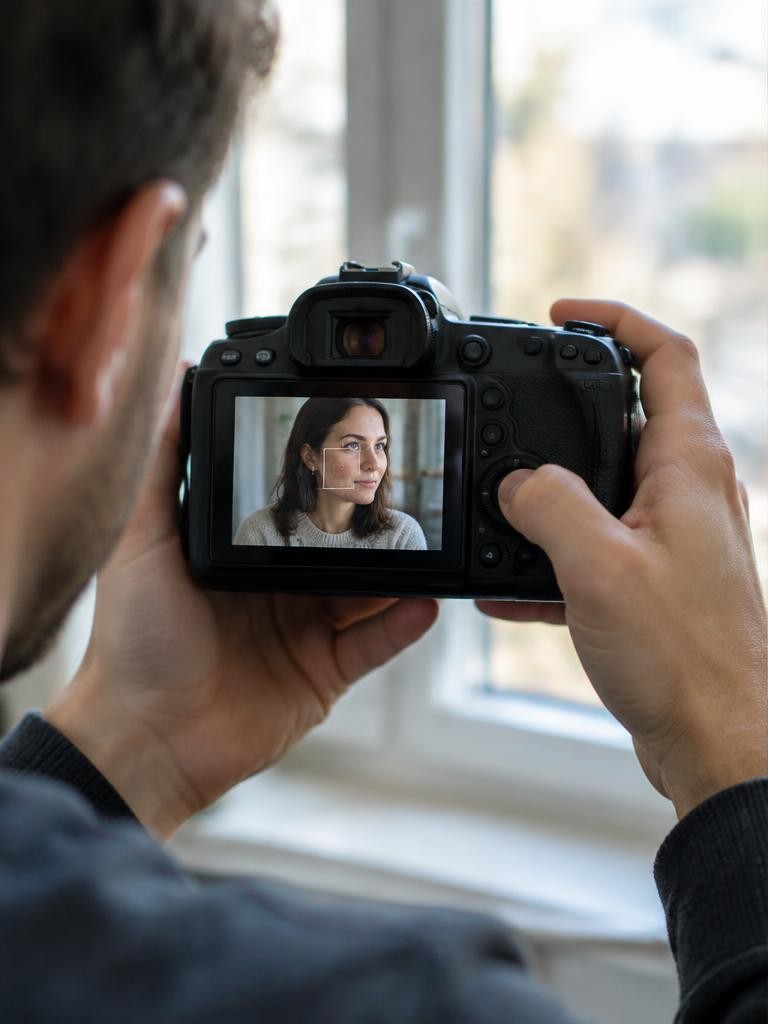
A focus point is a selectable location or small area in the frame where your camera evaluates autofocus. Place it over the detail you want sharp, such as an eye, and the camera adjusts the lens to focus at that subject distance. The point is an aiming tool, not a tiny island of sharpness. Other objects at approximately the same distance may also look sharp. Three separate ideas matter: the focus point identifies where to measure, the AF-area mode controls how the camera selects or follows that area, and depth of field describes acceptable sharpness around the focused distance.
01The rectangle is not the focus plane
The box in your viewfinder represents an autofocus sampling area, not a physical rectangle projected onto the subject. Its actual sensitivity and coverage depend on the camera, lens, and mode.
Once focus is established, the lens produces its best focus around a subject plane, approximately parallel to the sensor in ordinary photography. Real lenses can show field curvature, so this is a useful model rather than a perfect geometric promise.
Selecting an off-center box changes the subject distance the camera measures; it does not confine sharpness to that part of the photograph.
02Depth of field is a range, not a second point
Depth of field is the range of distances that appears acceptably sharp at a chosen viewing size. Sharpness falls away gradually rather than switching off at a hard boundary.
Aperture, focusing distance, focal length, format, and viewing conditions affect the result. Stopping down from f/2 to f/5.6 generally increases depth of field when the other conditions stay fixed.
It does not move a wrongly placed focus distance onto your subject. This distinction explains why an accurately focused near eye can be sharp while a farther eye is soft in a close portrait.
03AF operation: when the lens updates
AF operation describes what happens over time. Single autofocus, often AF-S or One-Shot, acquires focus for a mostly stationary subject and normally holds it while activation continues.
Continuous autofocus, often AF-C or Servo, updates focus as the subject distance changes. Manufacturer terminology and behavior vary, particularly with subject detection enabled.
Canon separates AF operation from AF area in its explanation. Manual focus is different again: you set focus yourself.
Choosing manual exposure does not automatically mean manual focus; exposure and focusing are independent controls.
04AF-area mode: where the camera may look
Single-point AF concentrates control in one selected area. Expanded or dynamic-area modes begin with your chosen point and may use neighboring areas to help with motion.
Zone modes allow selection within a larger region; whole-area modes give the camera broad freedom. Nikon's D5600 documentation illustrates these distinctions, although its exact options are model-specific.
A larger AF area does not produce greater depth of field. It changes the camera's selection freedom, which can help tracking but can also let it choose an unwanted foreground object.
05Subject detection adds a selection layer
Face, eye, animal, and vehicle detection attempt to recognize a subject inside the permitted area. They can make precise framing much faster, but they are not guarantees.
A camera may identify the wrong person, lose an obscured eye, or switch to a high-contrast background. Check which target is highlighted and use subject switching, a smaller zone, or a manually placed point when needed.
Availability varies by model, firmware, lens, and shooting mode. Learn one reliable fallback instead of assuming that the most automated option is always the most accurate.
06Step 1: match focus behavior to the scene
For a mug on a table, begin with single autofocus and a single point over a printed edge. For a person walking toward you, begin with continuous autofocus and a tracking or zone mode suitable for people.
These combinations solve different problems: the first prioritizes deliberate placement, while the second updates distance during movement. Read your camera's manual for the exact control names.
Avoid changing every autofocus setting at once. Establish a simple baseline, take several frames, and judge whether the camera selected the right subject before experimenting with tracking sensitivity or advanced release priorities.
07Step 2: position the point, then compose
Move the point with the joystick, directional pad, or touch screen until it sits over a meaningful, contrast-rich detail. For portraits, choose the nearer eye when you cannot keep both eyes sharp.
Activate autofocus, confirm acquisition, and release the shutter without changing your distance. At close distances and wide apertures, focusing centrally and then swinging the camera to recompose can shift the intended eye away from the original focus plane.
Prefer moving the point within the final composition. A focus confirmation indicator means the system found focus; it does not prove that it chose the detail you intended.
08Step 3: separate focus from exposure choices
A useful portrait starting point might be 1/250 second, f/4, and an ISO high enough for a correct exposure. If the subject moves more quickly, try 1/500 second.
If two faces at different distances must both appear sharp, try f/5.6 or f/8 and arrange them closer to the same distance when practical. These are illustrative settings, not guarantees.
Do not slow the shutter excessively just to stop down: movement blur can erase the sharpness you hoped to gain. Focus placement, depth of field, and motion control must work together.
Worked example
09Technical example: how narrow sharpness can be
For an illustrative full-frame calculation, a 50 mm lens focused at 2 m at f/2 gives roughly 1.91–2.10 m of depth of field using a conventional 0.03 mm circle-of-confusion assumption. At f/5.6, the approximate range expands to 1.77–2.30 m.
These rounded estimates depend on the sharpness criterion and do not predict every viewing condition. They show why a second face 30 cm behind the first may look soft at f/2 even when autofocus worked correctly.
Changing from one focus point to a zone would not expand either calculated range.
10Illustrative story: the fence wins
Imagine a beginner photographing a friend walking behind a low garden fence. This is a hypothetical teaching example.
Whole-area autofocus repeatedly selects the nearer, contrast-rich fence. The photographer changes to continuous AF with a smaller zone placed around the friend's face, checks the recognized subject, and raises shutter speed from 1/125 to 1/500 second.
More frames now show a sharp face. The improvement has two causes: better subject selection and less movement blur.
It would be misleading to credit the focus point alone, or to claim that the new AF mode increased depth of field.
FAQ
11Troubleshooting and common questions
Why is the background sharp instead? Check the selected point or detected target and look for foreground obstructions. Why is nothing sharp? Suspect movement, camera shake, severe defocus, or a dirty viewing surface before changing AF-area modes. Why is one eye soft? The eyes may lie at different distances outside the available depth of field. Does more AF-point coverage guarantee better pictures? No; coverage, detection reliability, lens performance, and your selection choices all matter. Can sharpening fix missed focus? Mild sharpening can improve edge contrast, but it cannot reliably reconstruct detail the lens never recorded sharply.
Try this
12Exercise: change one variable at a time

Arrange three upright book covers at staggered distances on a table. From a fixed camera position, use single-point AF to focus on the middle cover at a wide aperture, then repeat at f/8 while maintaining exposure.
Compare the near and far covers: this demonstrates depth of field. Next keep aperture fixed and move the focus point onto the nearest cover: this demonstrates focus-distance selection.
Finally try a larger AF area and observe which cover the camera chooses. Record the settings and inspect at the same magnification.
The exercise separates aiming, selection freedom, and the range of acceptable sharpness.
Sources & further reading
These references support the technical explanations. Exercises and starting settings are illustrative and should be adapted to your equipment and conditions.
- Canon: Everything you wanted to know about autofocus
- Nikon Digitutor: AF-Area Mode, D5600
- Cambridge in Colour: Understanding Depth of Field
Free resources from LensSuite
Was this guide helpful?